How to configure Cloudflare to Load Balance a WordPress Cluster
The success of a commercial product deployment depends on scalability, high availability, and performance. In addition, if the workload comprises several entry points for requests, smooth load balancing must be appropriately set up in order to achieve the desired uptime and speed. In this instance, using a DNS provider with origin server health checks is one option. It gets rid of a sin.
In this post, we’ll show you how to use a Cloudflare DNS load balancer with a health checks method to distribute workload for an enterprise-level WordPress cluster with two or more entry points. The same method may be applied to geo-distributed clusters, which will be discussed in detail in one of our next articles.
1 .Setup of a WordPress Cluster with a Custom Domain
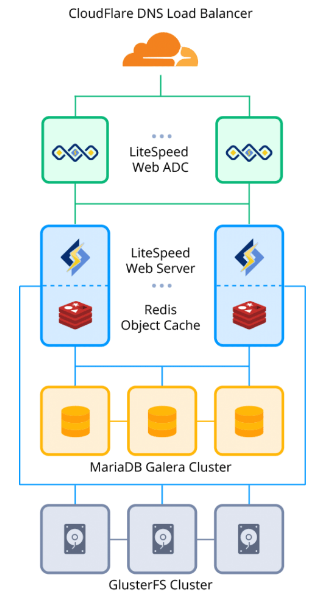
Consider the following scenario: you have a WordPress application with all stack layers clustered. It means the cluster has two LiteSpeed Web ADC (load balancers) as entry points (origins or endpoints).
Initially, at the domain registrar, an A record for each endpoint should be generated, leading to a custom domain name, such as wordpress-enterprise.jele.website.
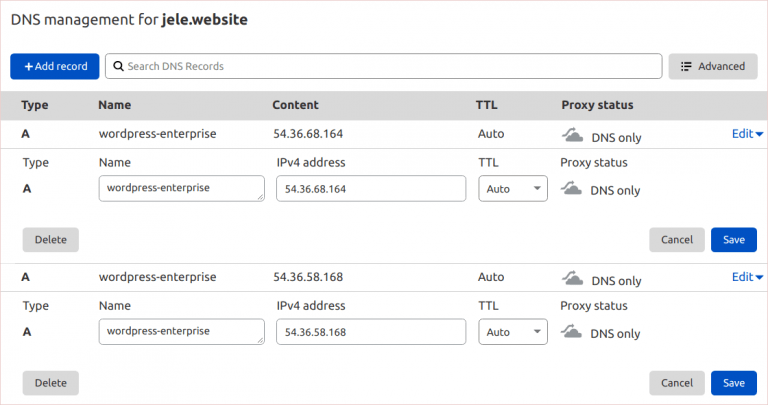
Note: If you’re planning to scale load balancers horizontally, add another A record to the same custom domain name for each newly provided public IP address.
2 .Purchase an SSL Certificate.
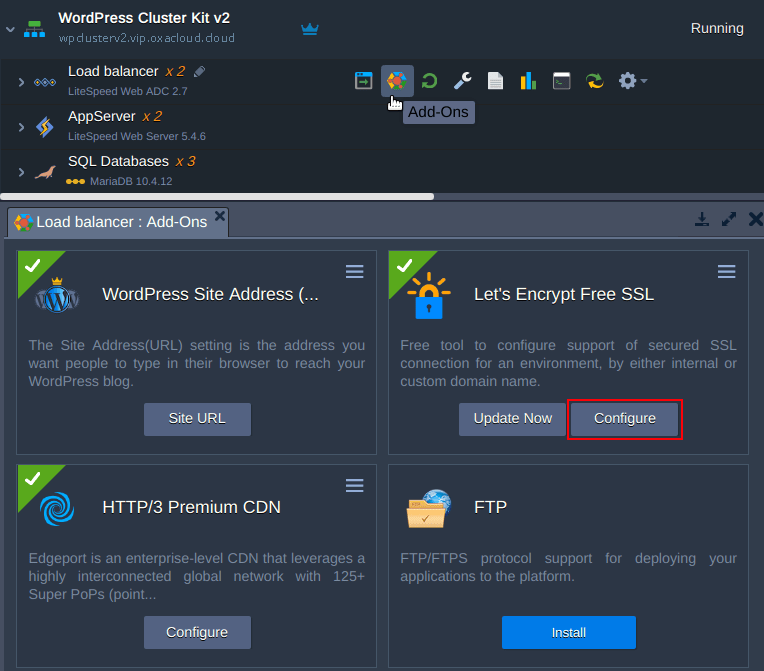
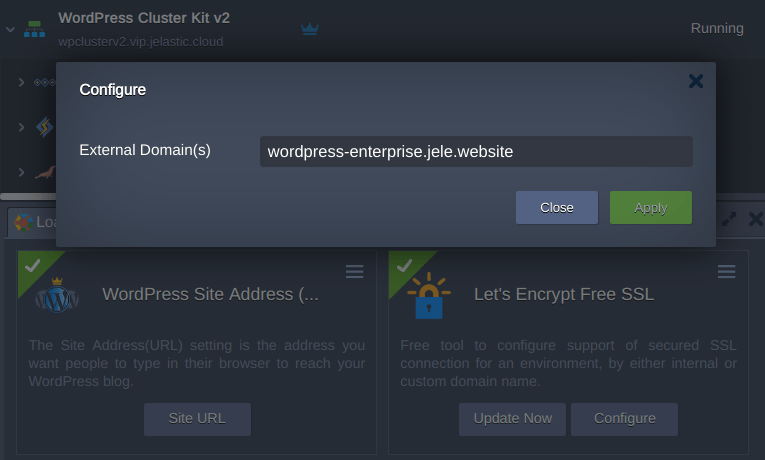
1.Bind the custom domain to the environment and issue SSL certificates for the entry points using Let’s Encrypt Free SSL Add-On.
2.Click Apply after replacing the platform-generated domain name with a custom one.
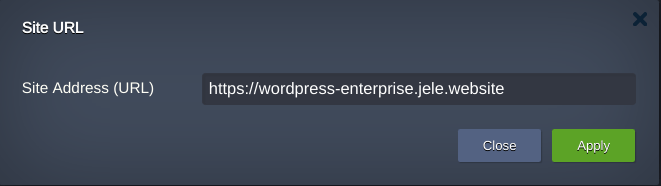
3.Use the WordPress Site Address add-on to change an old domain name with a custom one in all URLs on your website (URL).
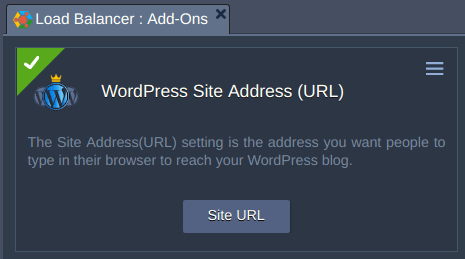
Compel Site URL button and provide URL with custom domain name
Your site is now served using the DNS Round-Robin method. When you try to resolve the domain name, you’ll get all of the addresses you’ve registered for it, including the ones that aren’t reachable.
3 .Setup of DNS Load Balancing
Let’s take it a step further and create a DNS Load Balancer object with endpoint health checks for the website.
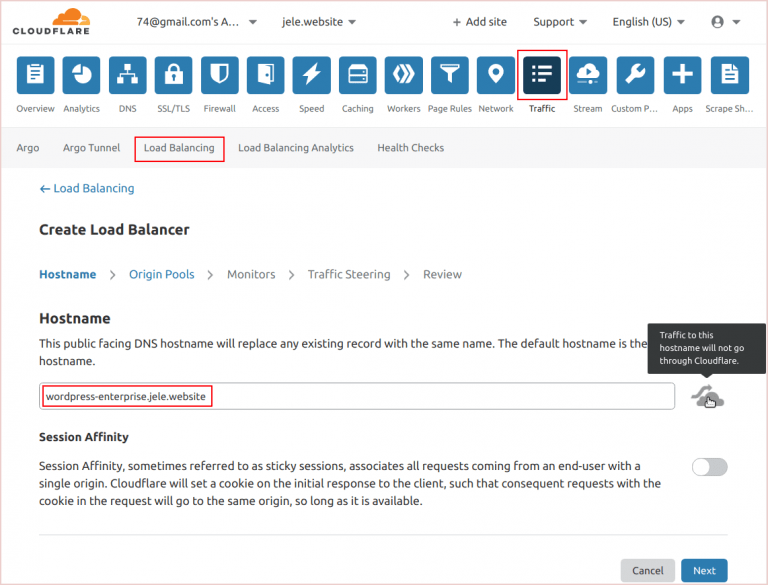
Open the Traffic Load Balancing Create Load Balancing section of the Cloudflare dashboard. Then type the custom domain for which you’ve set up A records. To travel through Cloudflare, make sure traffic proxying is turned off, as we’ll just be balancing DNS requests.
4 .Pools of Origin
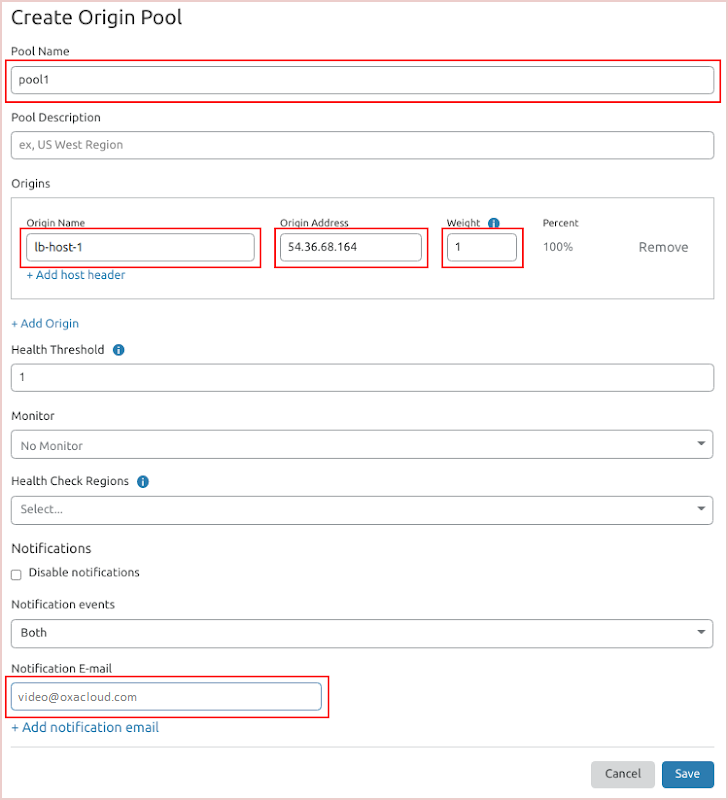
The creation of origin pools is the next phase. Because there are two A records, we’ll establish two pools, each with one load balancer as the origin. You can either follow Cloudflare’s instructions or provide random values for Pool Name and Origin Name. Set the Origin Address to one of the load balancers’ public IP addresses, and the Weight to one because the load balancers are equal. Scroll down to the Notification Email field and enter the address where you’d want to receive health check notifications. Save it by using the Save button. Consider the following example:
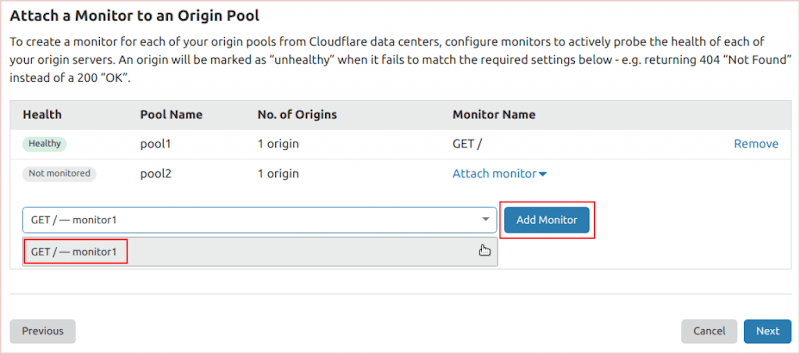
1.Create a second pool with a different name and the IP address of the second load balancer as the origin. Then, for each origin, designate a monitor to do the health checks.
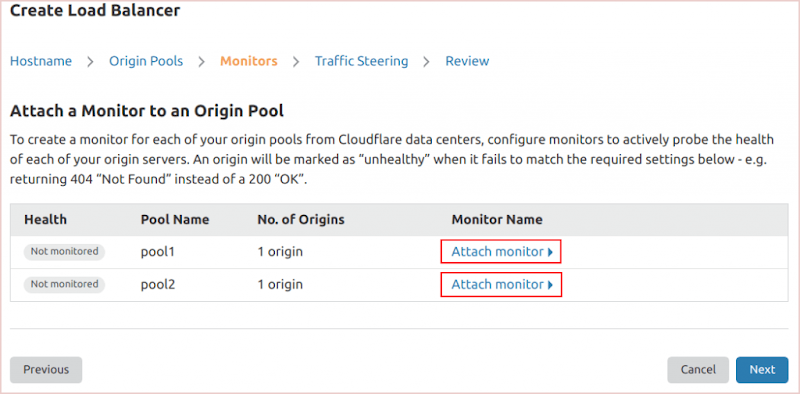
2.So, click on Attach monitor +Create a Monitor.

5 .Health Check Monitor
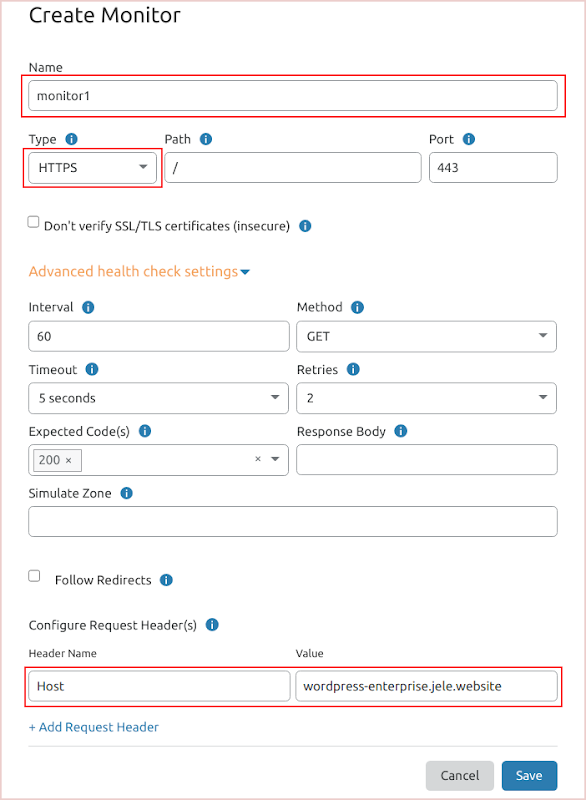
The settings for the health checks on the new monitor must be specified. Some of them are charged separately and are dependant on your subscription. By default, the interval between health checks is 60 seconds. You will be charged an extra 15 USD if you wish to make it shorter by setting it to 15 seconds.
As an example, you can use the Cloudflare monitor tutorial or just specify the monitor parameters as follows:
It is required to connect the monitor to the origin pool immediately after saving the adjustments.
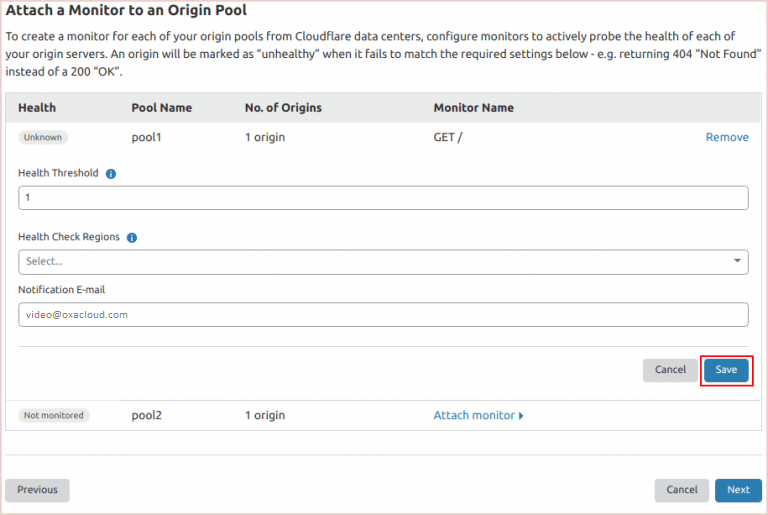
When the monitor is connected, the health check begins to work and displays the origin state in real time. Connect the second origin to the same monitor as the first.
6 .Health check notification
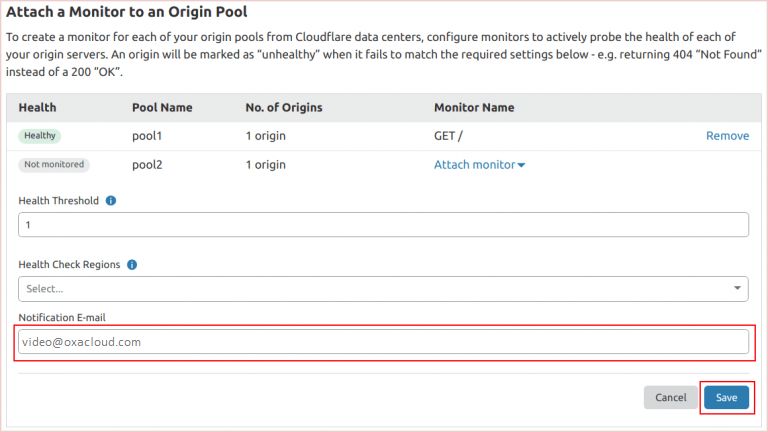
The monitoring is supported by an email notice that you can specify when you create the pool or when you attach the monitor to that pool.
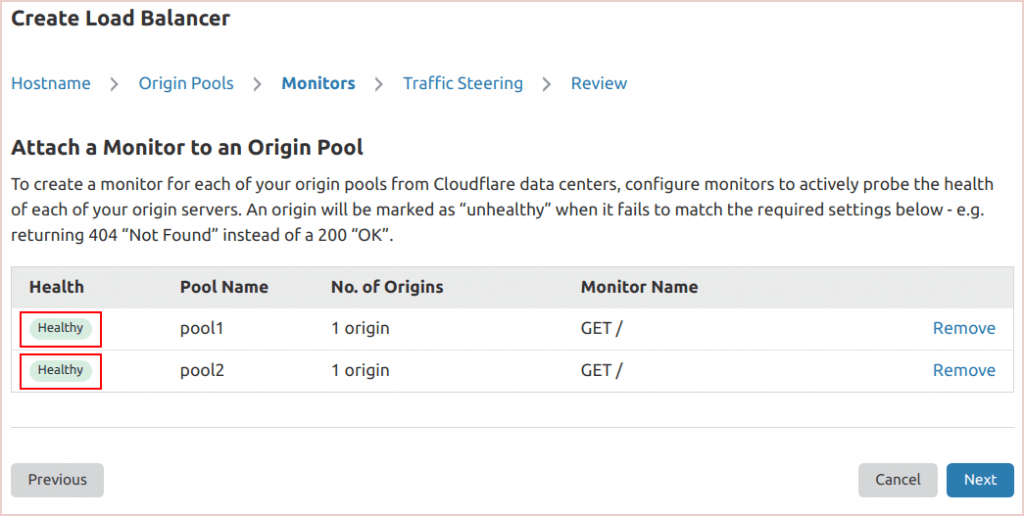
You have to make sure that both entry points are healthy and go further.
7 .Traffic Steering
Traffic Control Traffic steering is the next step. This option enables you to specify the load balancing algorithm based on your current subscription. For the basic 5 USD subscription level, for example, you can only use:
- The usual failover method is turned off, and traffic is routed from the unhealthy pool to the next healthy one.
- Surprising: At random, take a route to a healthy pool.
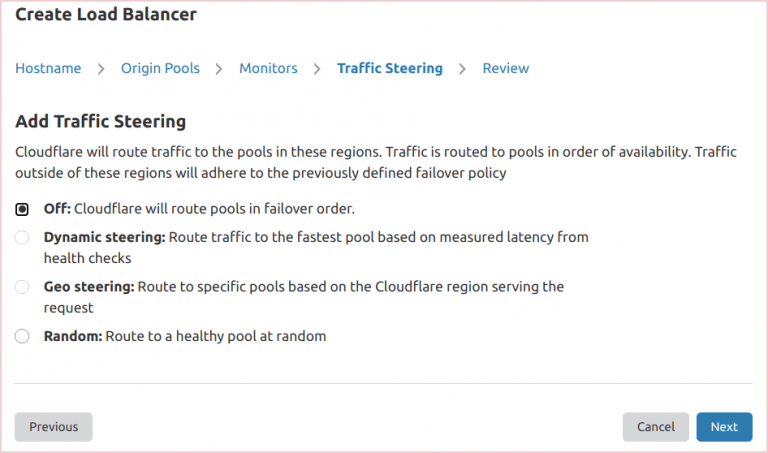
If you have an enterprise level subscription, the following options will be available to you:
- Dynamic steering identifies the fastest pool for a specific Cloudflare Region or point of presence based on health check results.
- Geo steering directs traffic to pools based on the client’s geographic location or point of presence. A region can have multiple pools assigned to it, and the balancer will use them in failover order.

Because we are not using a geo-distributed cluster and both origins are in the same region, we will use the conventional failover in the current example . Finally, press the Save and Deploy buttons.
DNS Load Balancing Testing
It is unquestionably required to ensure that DNS load balancing functions effectively in relation to the condition of endpoints. To do so, use Web SSH to issue the following commands on one of the load balancer nodes via Web SSH (see picture below)
- Resolve the custom domain to see which endpoint IP address is returned:
dig wordpress-enterprise.jele.website +short
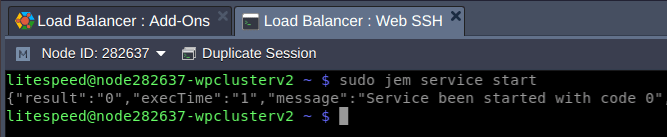
- To simulate a server failure, turn off the load balancer service in one of the containers.
sudo jem service stop
* Wait 60 seconds for the health check interval to end before attempting to resolve the custom domain name. It goes without saying that you should test the application’s functionality in a web browser.
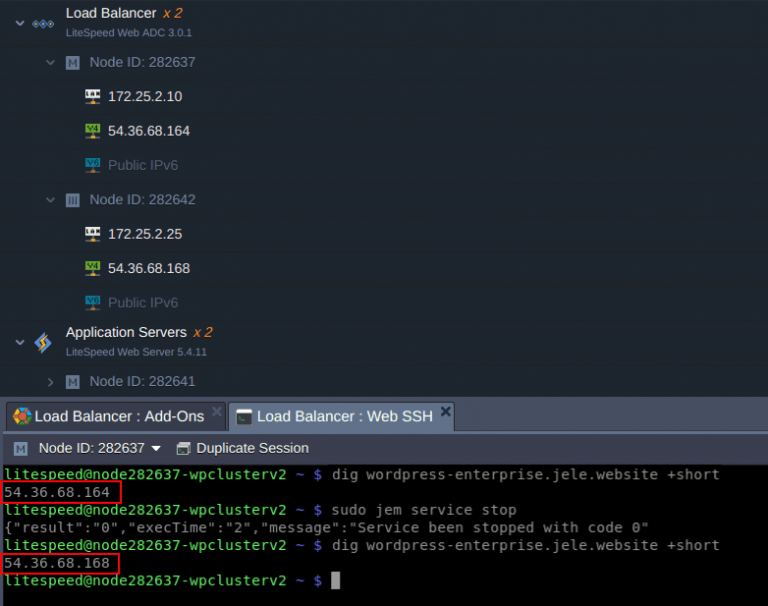
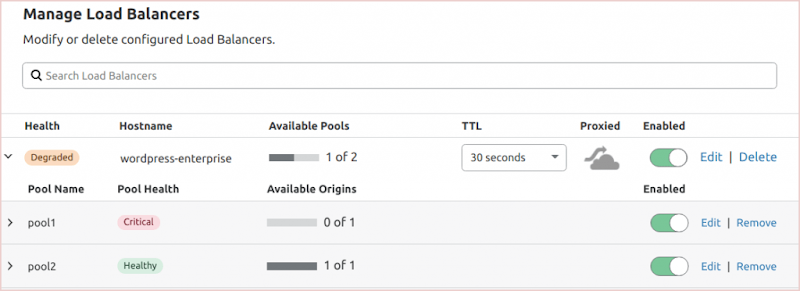
Only the IP address of the healthy endpoint is returned, as you can see. In the Cloudflare dashboard, you can see the state of the cluster origins.
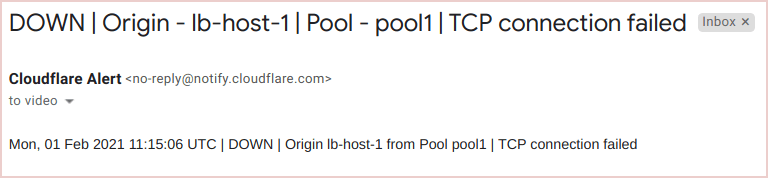
A notification about the connection failure to one of the entry points will be delivered to your mailbox through email.
Remember to turn the origin back on and check the health status after one minute.
The delighted email will inform you that the cluster failed origin is now reachable and healthy.
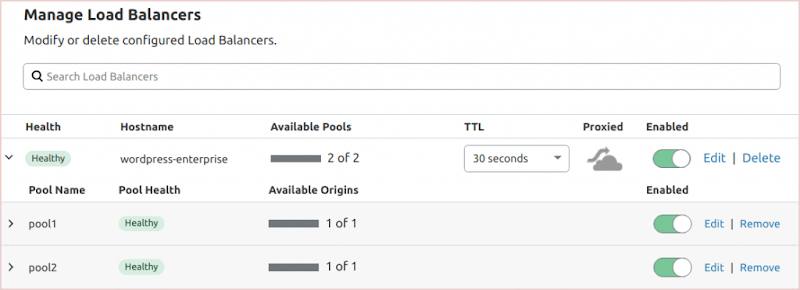
8 .DNS Load Balancing Tuning
If necessary, you can alter the load balancer’s extra functionality, such as:
Origin Servers – number of origin servers
Faster Checks – health check interval
Check From – number of Regions the health checks can be performed from
Traffic Steering – enables/disables traffic routing algorithms
Congratulations on your achievement! Cloudflare’s DNS load balancer now maintains your website.
Try for free and without obligation, by clicking here, Wordpess cluster cloud hosting on the Oxacloud platform. Extremely advanced performance is provided by a new generation of LiteSpeed application servers, a load balancer with fast HTTP / 3 protocol support, reliable MariaDB Galera, built-in CDN and Let’s Encrypt SSL.
Our support team is on hand to answer your questions and resolve any issues you may encounter during your trial period.