How to reduce Cloud Waste with Automatically Scheduled Hibernation
During certain stages of a project’s lifecycle, such as development or testing, around 70% of resources are wasted during off-peak hours: at night, for example, or on weekends. It would be a smart move to shut down your environment during such a slowdown period to reduce expenses.
On its marketplace, Oxacloud provides you with the Env Start / Stop Scheduler add-on, specially designed to automatically stop and restart an environment according to the prescribed synchronization instructions and which allows considerable savings, especially when working on several environments. .
Such automated management of the environmental lifecycle helps reduce expenses on testing and development projects by turning them off when no development is being performed.
Here are the steps to install and manage this add-on:
Hibernation Scheduler Installation
The installation of this module is a simple process and is automated. The module is added as an add-on on Oxacloud Marketplace
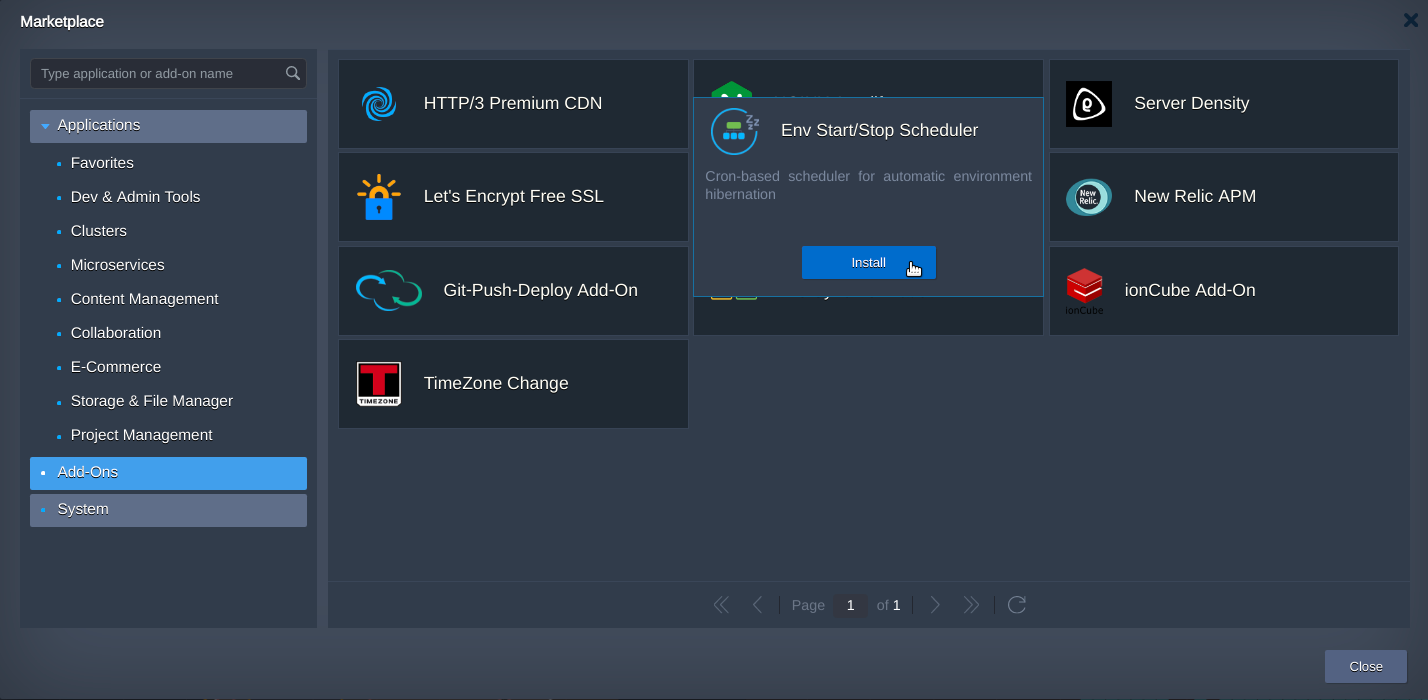
- If you already have an account, log into the dashboard and click on the Marketplace button in the top pane. You can create a new account for free by clicking here

2. Go to the Add-ons tab and find the Env Start / Stop Scheduler solution. Hover over it and click on the Install button that appears.
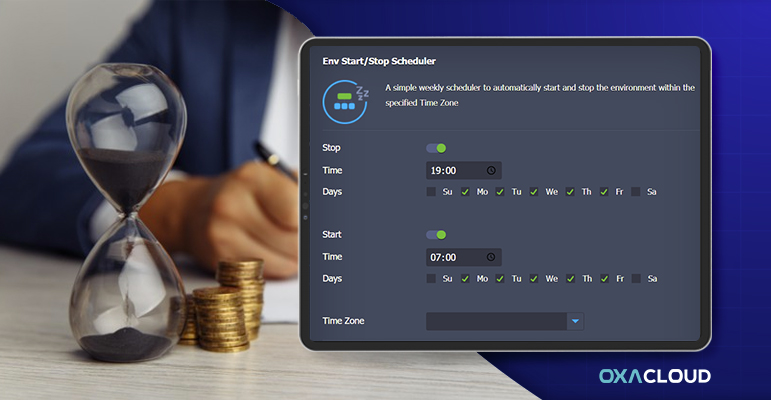
3. Provide the following data to customize the add-on according to your needs:
- Activate the Stop / Start buttons and specify the time at which the environment should be stopped / started respectively
- Select the days of the week for each action to apply
- Choose a preferable time zone
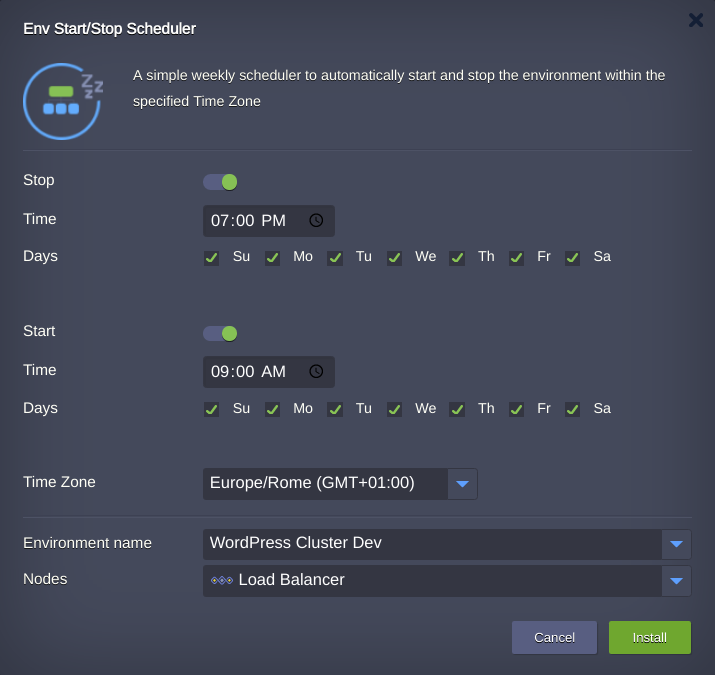
- Environment name – target environment to be managed by the add-on
- Nodes – environment layer the add-on will be installed to; it is fetched automatically upon selecting the environment (we recommend leaving this field with default choice).
Note that Start / Stop Scheduler can be run on only one layer at a time; otherwise (that is, if it is integrated into several), only the last one installed or configured will work.
Click Install to add a scheduler.
4. In a moment, you’ll see a notification about the operation being completed successfully.
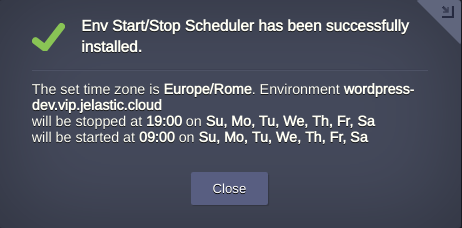
That’s it! The add-on has been installed and is already working, being ready to regulate your environment activity time based on the given schedule in compliance with the Time Zone you chose.
Hibernation Scheduler Management
In case you need to adjust the start / stop conditions after installation, this can be done directly via the dashboard:
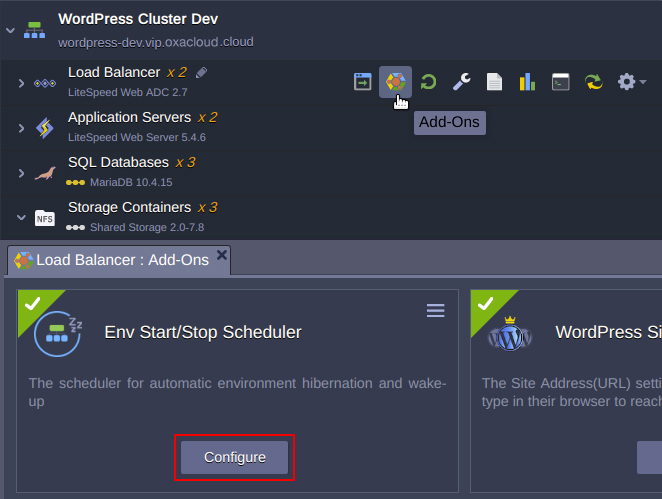
- Click on the Add-Ons icon next to the environment layer, where the solution was installed. Within the opened tab, find the scheduler and select the Configure button.
- The appropriate frame will be shown, allowing to set new values for the Stop and Start time, Days and Time Zone. For example, you can untick the weekends, so the environments will be fully deactivated during these days.
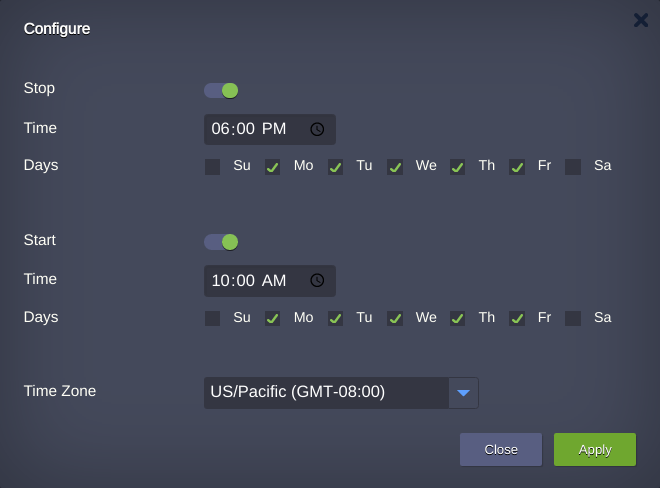
Click Apply to use the changed settings.
Note In the event that the destination environment is shared among multiple collaborators, only one collaborator can install and configure the add-on. Thus, avoid situations where the first collaborator installs the add-on and the second configures it and vice versa.
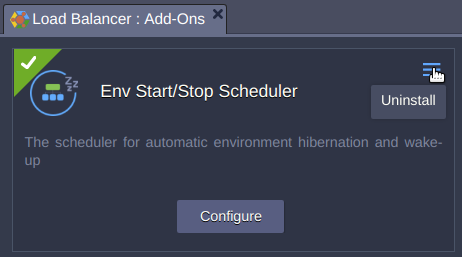
- When moving a project to production or in case you just don’t need this solution anymore, use the menu at the top right corner of the scheduler configuration to Uninstall it.
Now you know how to avoid wastage in the cloud with an automatically scheduled hibernation using the Oxacloud Env Start / Stop Scheduler add-on. So do not hesitate to Organize the availability of your environments to maximize resources and save money on your test and development environments.
During your FREE trial period, our support team is available to answer your questions and resolve any issues you may encounter.