How to create your PrestaShop online shop with a few clicks
Faced with the embarrassment of choices of online store creation platforms, PrestaShop has established itself as one of the best web applications and is very popular with development enthusiasts and professionals alike.
This Open source solution, very complete and easy to use, allows you to manage your orders, your stocks and your products without having any technical programming knowledge. The platform also offers the possibility of exporting your products to major marketplaces, including eBay and Amazon.
let’s see the steps to launch your online store:
The steps to create an e-commerce with PrestaShop
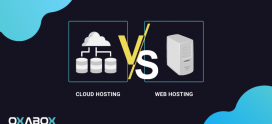
1. Choice of web hosting
The first step is to choose a web host that will allow you to launch your online store and develop it according to your desires and your needs without worrying about the costs. Your site will thus be hosted on an optimized platform, ready to use and you will not have to worry about the technical aspect which will be provided by your web host.
2. Install PrestaShop on Oxacloud
To install PrestaShop, OXABOX provides you with a marketplace on the PaaS Oxacloud platform with two installation modes: automatic and manual.
Automatic Prestashop installation
To install PrestaShop in 1 click, OXABOX provides you with the PaaS Oxacloud platform. This solution will take care of all the software management part of your e-commerce application. All you have to do is click on “Get it hosted now”, enter your email and you’re done.
Manual PrestaShop Installation
Here are the steps to install PrestaShop on the Oxacloud PaaS marketplace.
- Create Environment
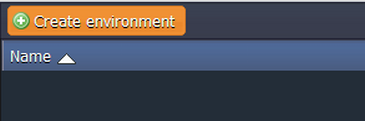
1.Log in to the Oxacloud dashboard.
2.In the Oxacloud dashboard, click on the Create environment button at the top left:
3.Pick Apache PHP application server and MySQL database.
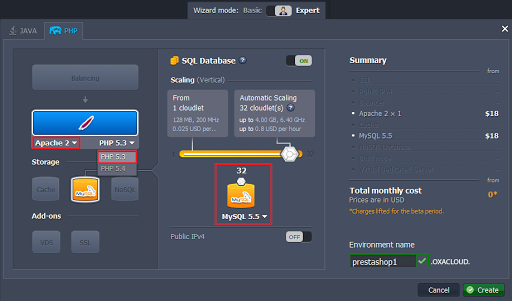
4.Wait just a minute for your environment to be created.

-
Upload Application Package
1. Go to PrestaShop site, download the latest PrestaShop version as a zip package and upload it using Deployment manager.
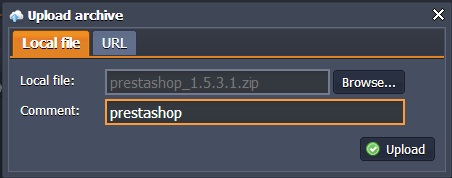
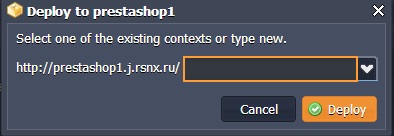
2. Once the package is in Jelastic, deploy it to the environment you have just created.
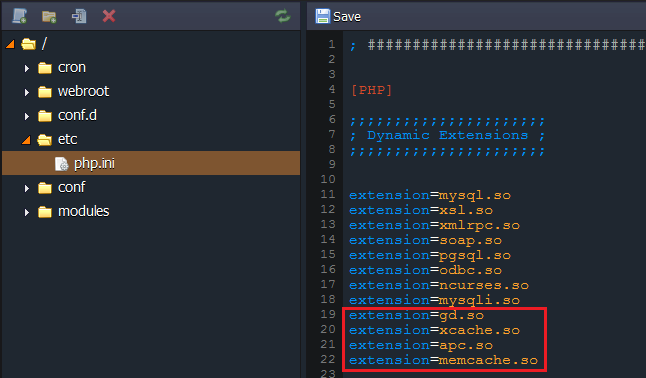
3.For using PrestaShop you need to include gd.so, xcache.so, apc.so, memcache.so modules. For this click Config button for your Apache server, navigate to etc/php.ini and add extension=gd.so, extension=xcache.so, extension=apc.so, extension=memcache.so lines as it is shown in the picture below:
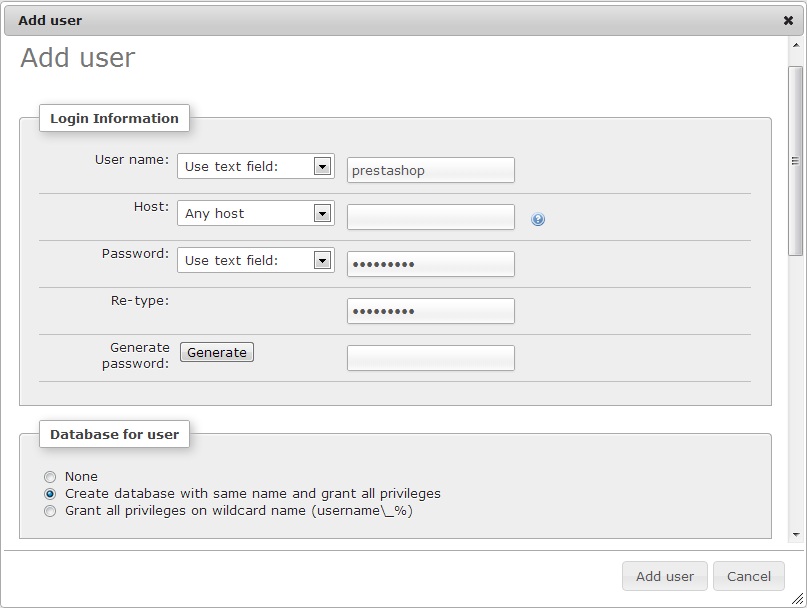
Click Open in Browser button next to the MySQL node. Log in to phpMyAdmin using credentials, which you’ve got via email while creating your environment. Create an account and the same-named database.
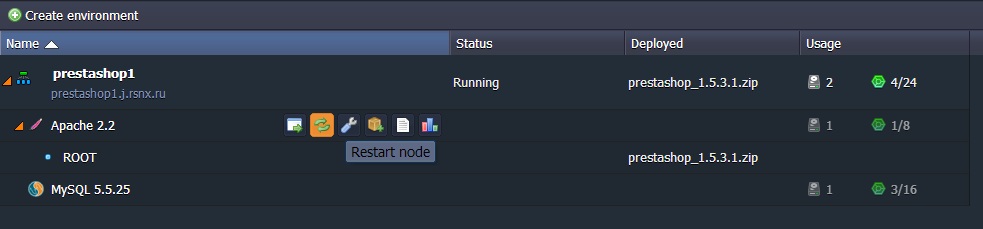
- Go back to the dashboard and restart Apache node.
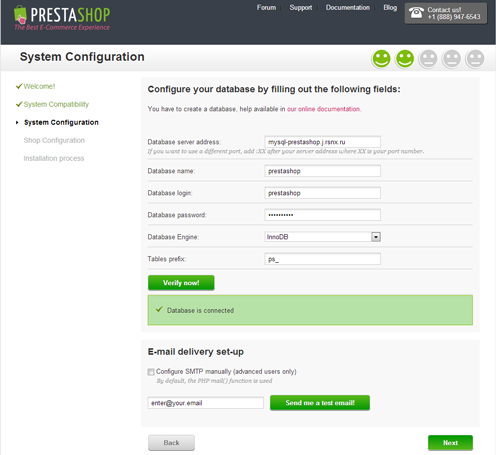
Now you can open your application in browser and install it. Process of installation is rather simple, but let’s pay a little attention to the database connection. Just fill in form with database server address, database name, login and password which you’ve used while creating your MySQL user.
Once downloaded using the module, install PrestaShop in 1 click or manually, you can access the module’s commands by identifying yourself and configure your online sales site.
Thanks to Oxacloud platform, you can easily set up your online store with PrestaShop.
Get a free trial of Oxcloud’s PaaS platform by clicking here.